Switch Accounts
NOTE: The steps below can also be completed within the MyBotRun app, but this method is faster. If desired, a guide on how to do this within the app can be provided.
Open the Profiles folder within the xbebenk root directory, where you pulled the code from Github via Sourcetree.
Copy the MyVillage folder, and rename it to a different name (I named mine default). This will be used as a template for future accounts.

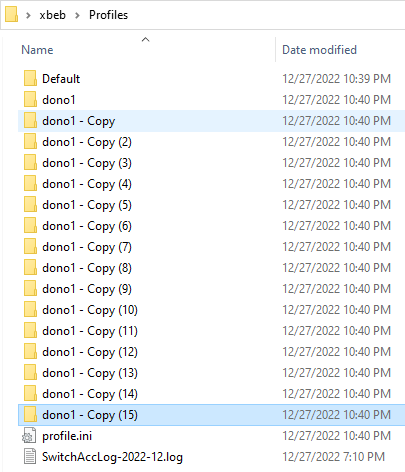
Repeat the process of copying the template folder, and renaming it to a new name for each additional account.
If you want to create 15 accounts, then create 15 folders
Keep in mind that each BlueStacks instance can support up to 16 Clash of Clans accounts.
In my example, I named them dono# because these particular accounts will be donation accounts.
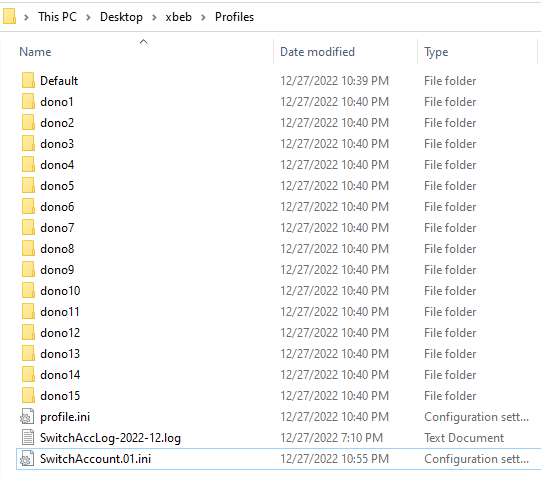
Rename each folder after each one was created to the naming convention you choose (dono1, dono2, dono3, etc.)
To switch accounts in MyBotRun, you can use the SwitchAccount.01.ini file to specify which accounts you'd like to switch to.

This SwitchAccount.01.ini file is not present in the Profiles folder by default, but a copy can be found in the Configs and configured for a specific number of profiles.
Configured for 15 profiles named dono1, dono2, etc
Once you've done this, open MyBotRun, right-click on MyBot.run.au3 and select "Run Script (x86)"
if a User Account Control window appears, select Yes

Let is start, and open BlueStacks and CoC, Stop the bot if it auto starts.
Go to the Bot tab, then the Profiles sub-tab and select the Switch Profiles dropdown.
The profiles you've created will be listed here, and you can select the one you want to switch to.

If not selected, Select the first account from the dropdown list (e.g. dono1, coc1, etc.) and wait for it to load.
You can check the status at the bottom of the MyBotRun application to confirm that the profile has been loaded. "Status: Profile dono1 loaded from..."

On BlueStacks, go to the first logged-in account that you want to associate with this profile and wait for it to load.
Select the blue down arrow to sync the account with the profile.

The status at the bottom of MyBotRun will indicate that the shared preferences have been pulled. "Status: Pulled shared_prefs of profile..."

Repeat this process for EACH account. It is important to wait for each new profile to load and for the account you want to associate with that profile to load before moving on to the next account.
Failure to do this may result in the bot not properly switching accounts.
Last updated